The Finished Invitations
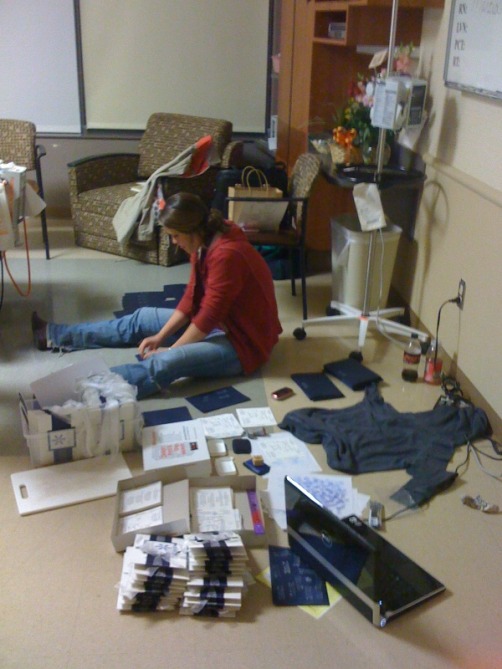
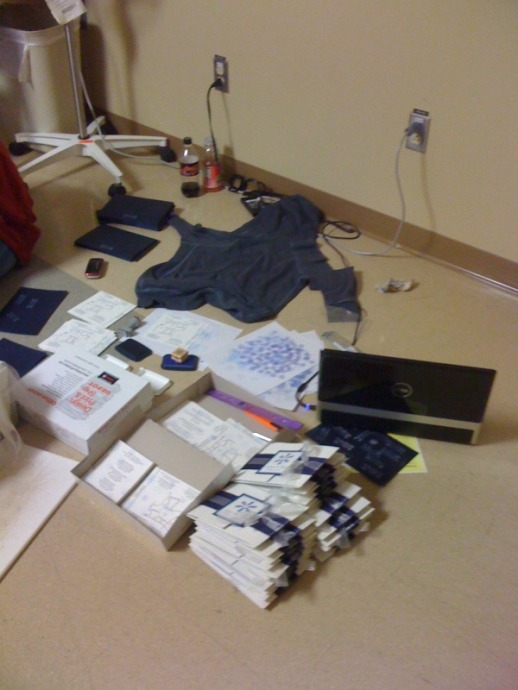
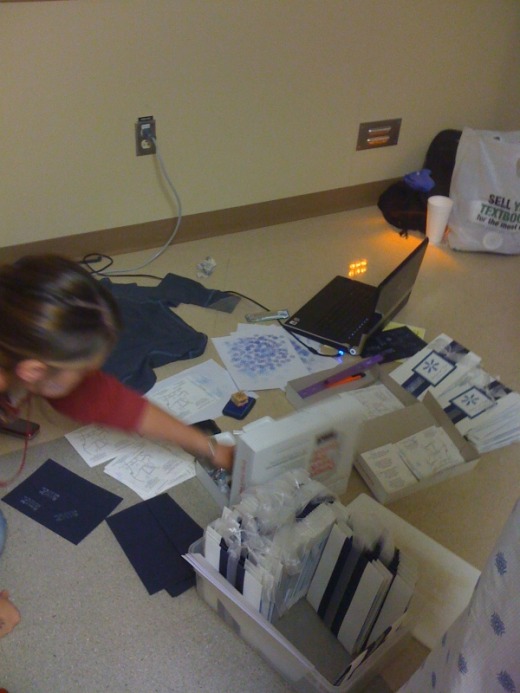
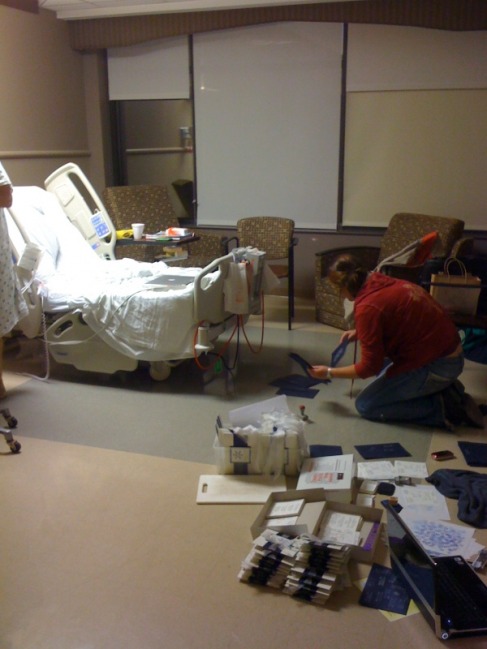
A week ago I wasn't completely sure what was going to happen with all of the wedding stuff because of a family emergency. Here's the summary: My dad went out running last Sunday (10/18) and had a cardiac arrest. One of our neighbors found him in the street and started CPR. The paramedics were able to shock his heart and get it into rhythm right away. He was then rushed to the ER and was put into induced hypothermia and sedated for 24 hours. They were able to warm him up and wake him up on Monday night. He was pretty out of it Monday and Tuesday. Wednesday he finally started feeling better. His short term memory was shot those first days (think Dori from Finding Nemo), but it's pretty much all better now.
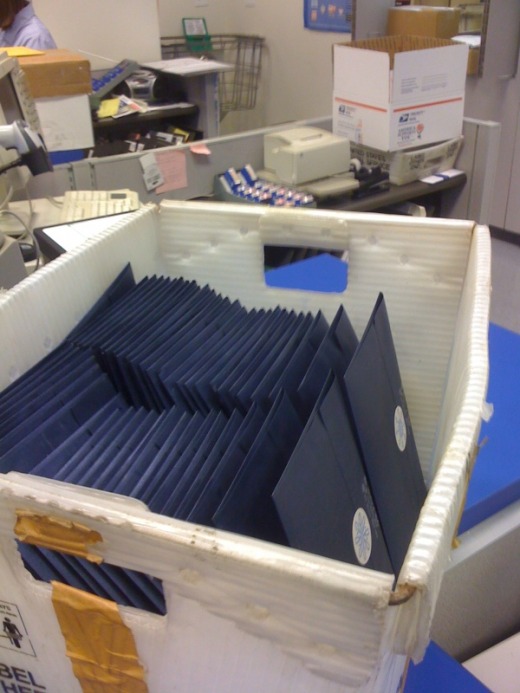
Anyway, that whole week my mom and I spent our days in the ICU with my dad. Once my dad was feeling a little better and got moved up to the progressive ICU, we carted over the invitations to my dad's room and set up shop. We even got chewed out by one nurse, but persevered and were able to get them finished Friday night. So early Sat morning we headed over to the Post Office and got them sent out. So so exciting. :o)

Save the Date Postcards
I designed these using Photoshop and then ordered postcards through VistaPrint. I used one of their 100 Free Postcard deals, so even though they get you with the upload fees (I had to pay for images for both the front and back) and shipping, I still only paid about $14. And since these are postcards, we can use the 27 cent postage instead of the normal 42 cent rate. Yay!


Will You Be My Bridesmaid? Cards
I wanted to ask my BMs in some way other than just a phone call, and even though this idea isn't as original as it used to be, I still thought it would show them how important they were to me. It took me a little while to make these, but I think they turned out great and they loved them.


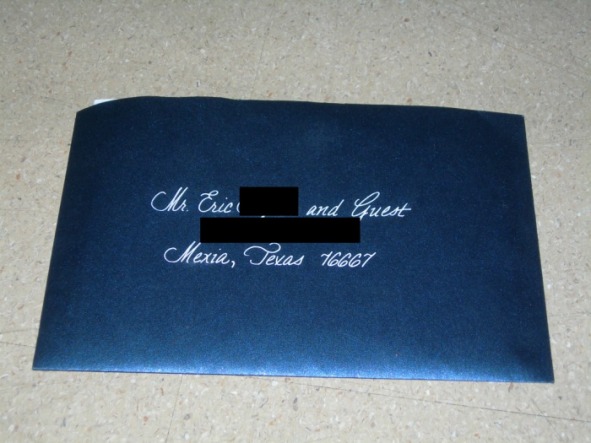
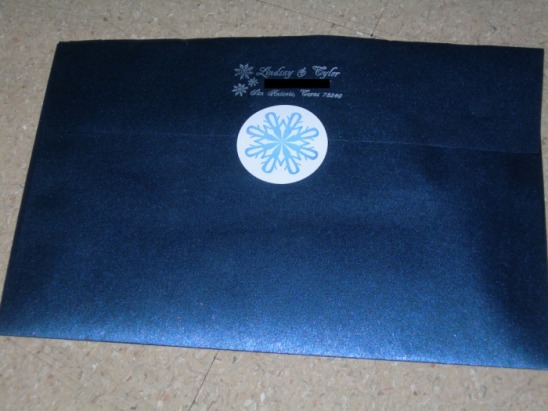
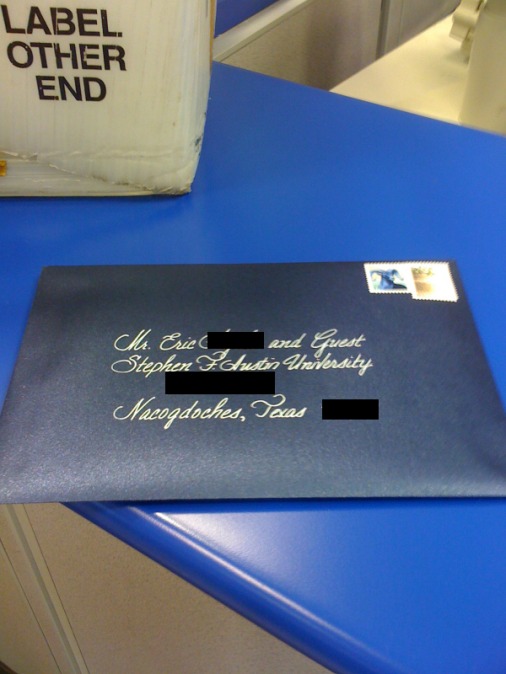
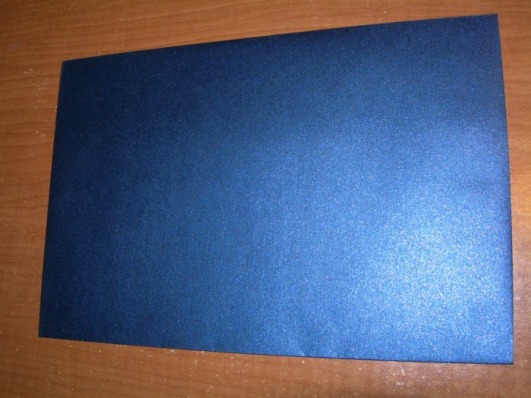
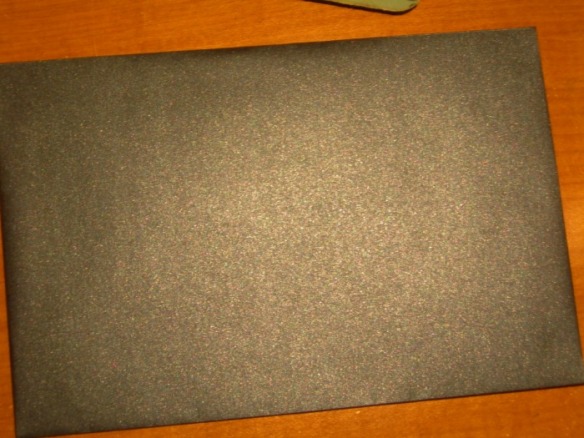
Envelopes
I ordered a pack of 100 Stardream Lapis Lazuli from envelopemall.com in the 6"x9" booklet for $31 something ($40 with shipping). It was the cheapest I could find and the shipping ended up being super fast (I ordered on Mon night and had them by Friday). I'm so excited about these! I can't wait to take them up and have my mom calligraphy one.
Here is a picture of the envelope. It's actually a lot darker in person because the flash highlights the blue, but you can still see the richness of the dark blue.
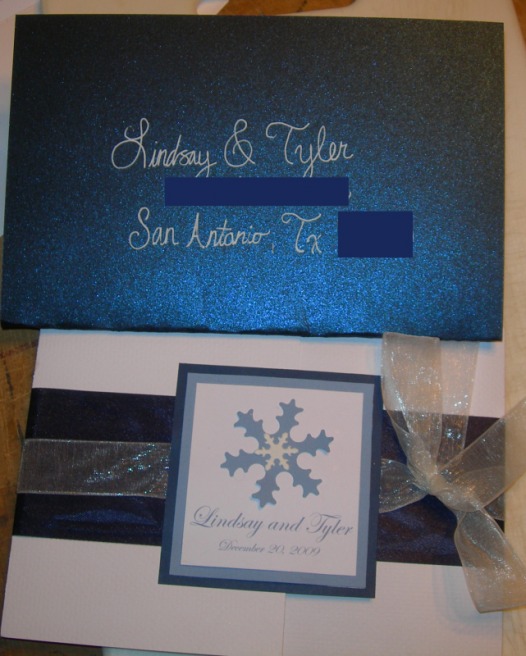
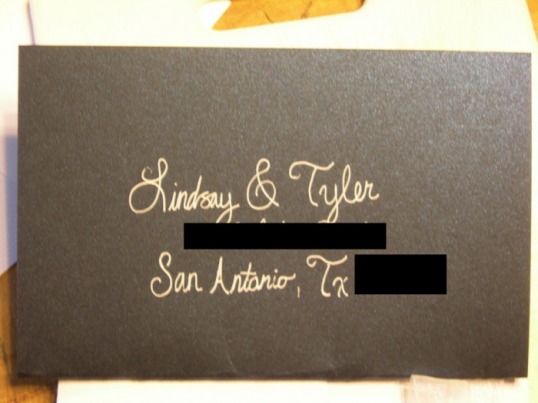
She had originally said she could just write the return address on the back herself, but with so much other stuff to do I decided it might be nice to not make her do that. So, I ended up ordering a hand stamp from RubberStampChamp.com. I made my own black and white design in photoshop and then uploaded it to the site. I got the 3/4" x 2" size for $7.75 They offer free shipping for orders over $10 (yea, I had to re-read that thinking they accidentally left off a zero or something), so I went ahead and ordered a 3/4" square stamp of a snowflake for $4.25. I'll let you know how they are when I get them next week!

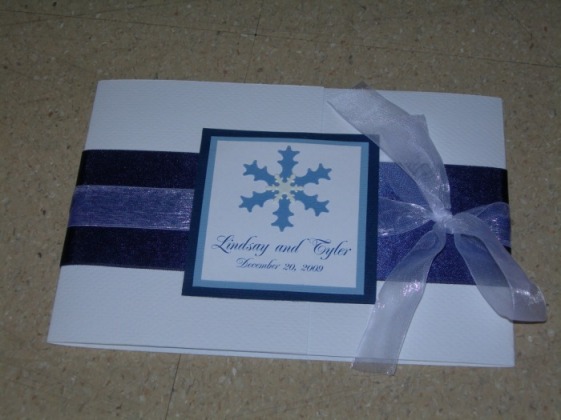
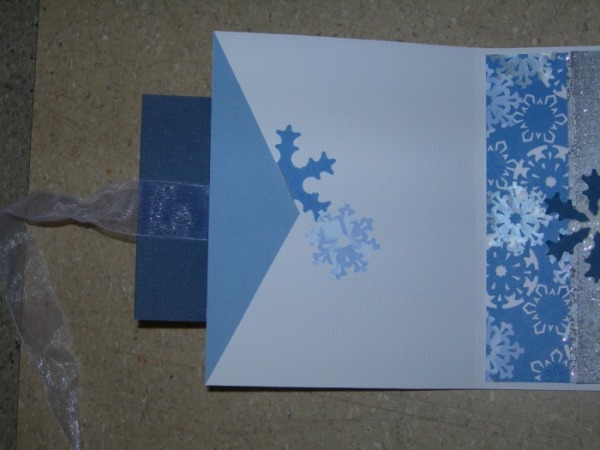
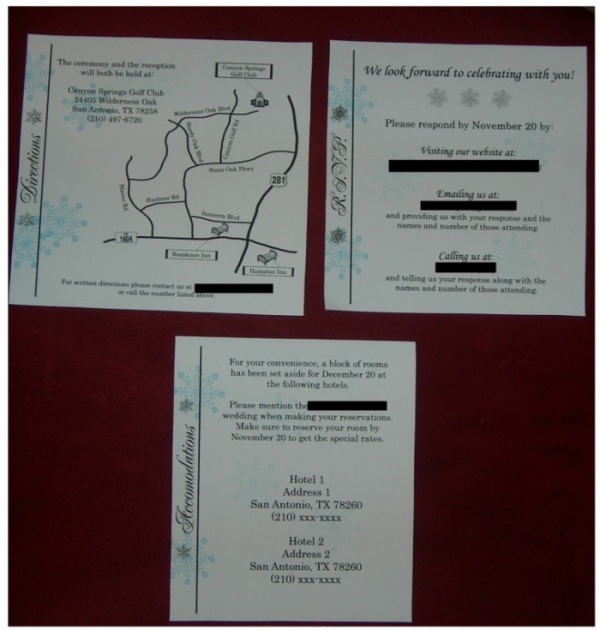
Invites
And the invite production has officially begun! It finally took my FMIL reminding my mom over Labor Day weekend that we were at 103 days out, which equaled panic time. My poor mom. I think she did start panicking because out came the invitation supplies and before I knew it she had all of the white pocketfolds cut out and folded.
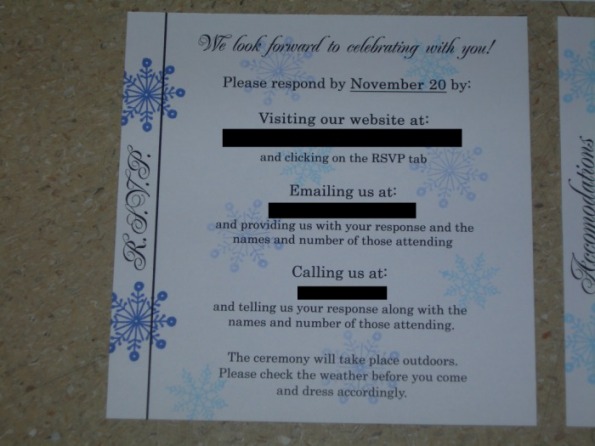
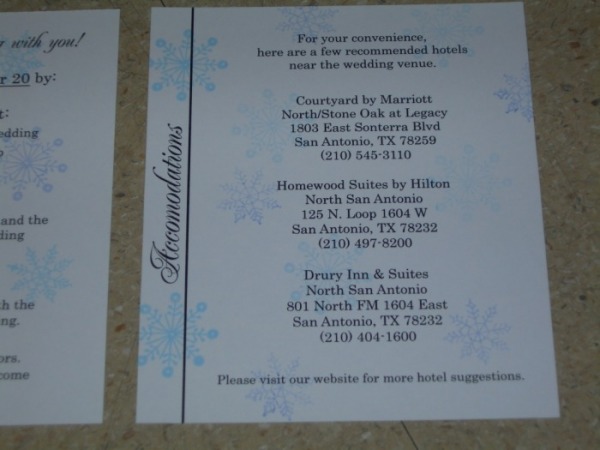
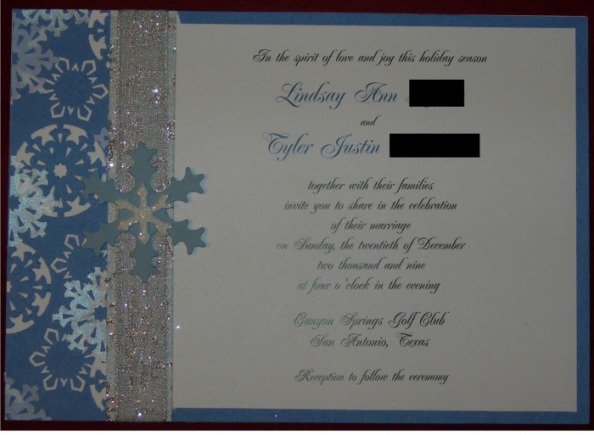
UPDATE 10/10: We are getting close to being done! All of the pocketfolds are finished. The invitations themselves are all done except we might add a dark snowflake on top of the ribbon (have to wait on new snowflake punches, the old ones pooped out). The insert designs are all done, now we just need to have them printed. Then we will cut them out and stamp them with blue snowflakes. The calligraphy is all done except for about 5 envelopes that we need updated addresses on.
We weighed one of the invitations last night and it came out to 2.25 oz. The cut off between $0.61 and $0.78 is 2 oz. We didn't have the real inserts in yet (we were planning on using 110lb cardstock and right now the ones in it are on 67lb) so I don't know if that will increase the weight at all. I'm really hoping my mom's letter scale was slightly off and we could somehow get them for the 2oz rate. Seriously, an extra 0.25oz won't break anyone's back or truck or whatever the ounces matter for. Please just let us save some money?
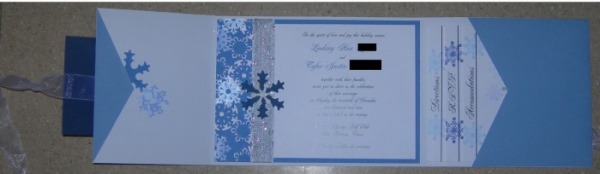
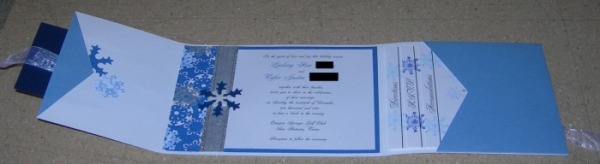
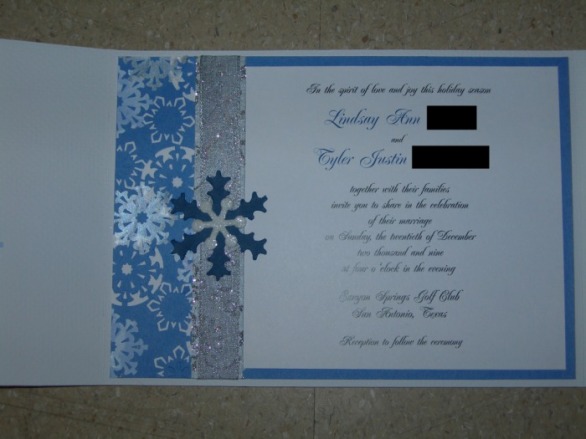
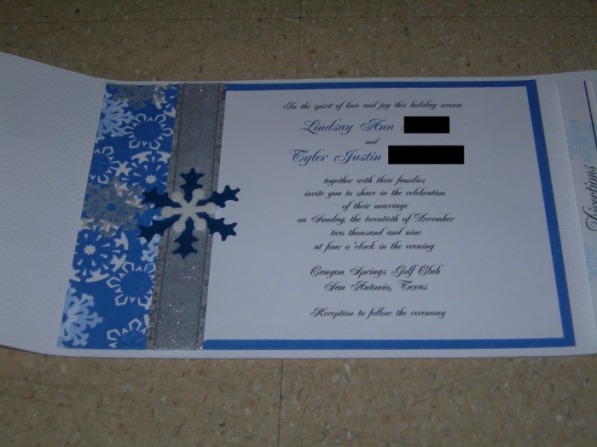
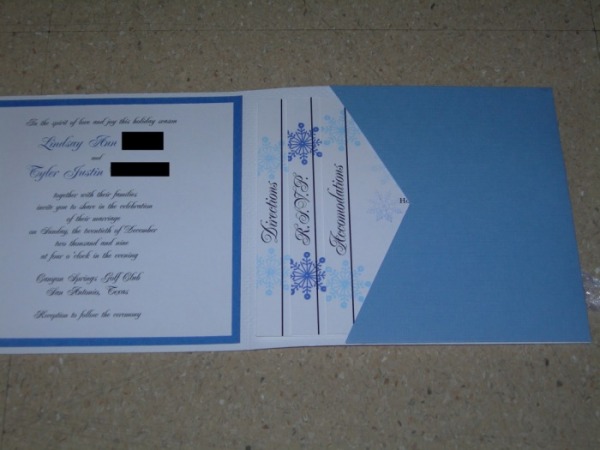
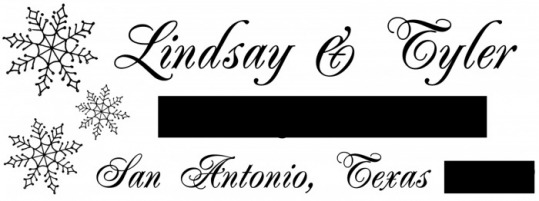
The Almost Final Invite
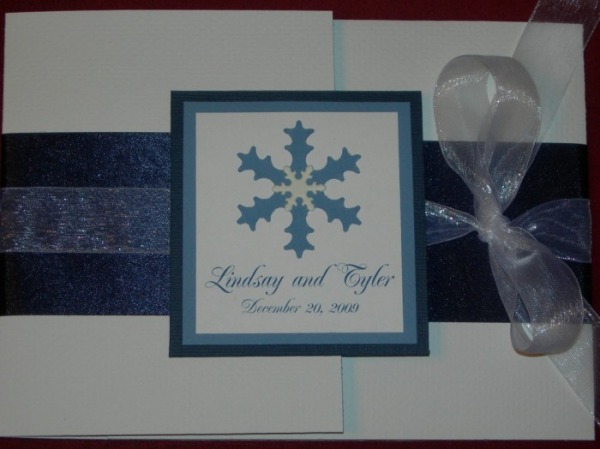
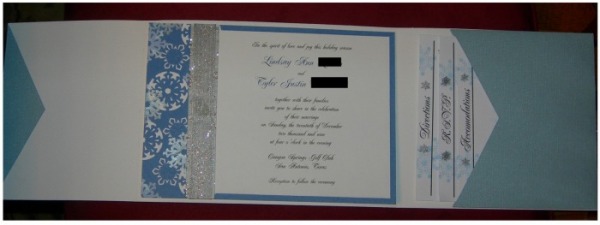
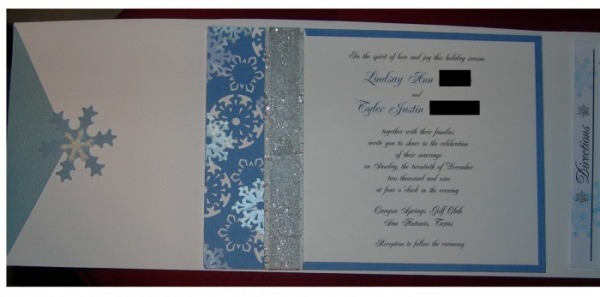
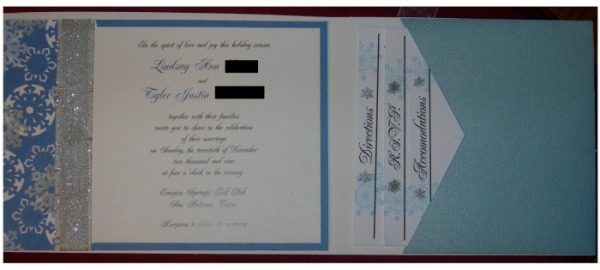
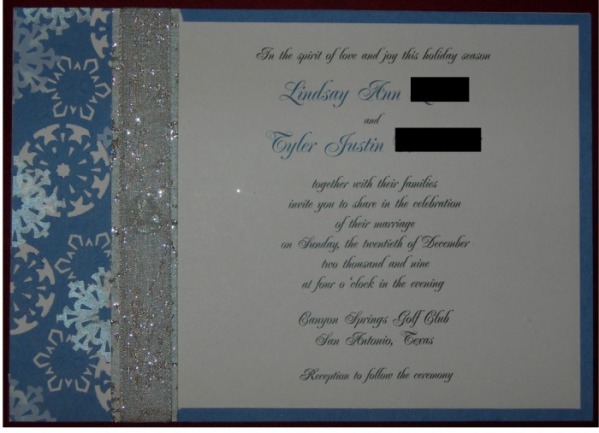
In the spirit of love and joy this holiday season
Lindsay Ann Lastname
And
Tyler Justin Lastname,
together with their families
invite you to share in the celebration
of their marriage
on Sunday, the twentieth of December
two thousand and nine
at four o'clock in the evening
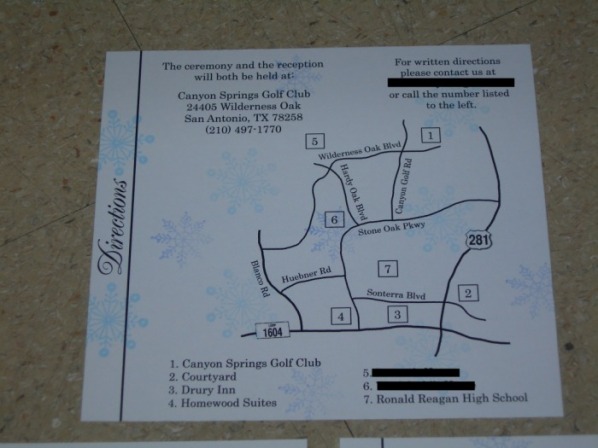
Canyon Springs Golf Club
San Antonio, TX
We wanted to keep the invites nice but not very formal. We decided on the font Renaissance, which I think I downloaded for free from dafont.com. It's slightly fancy but I felt it had a fun loopiness to it that keeps it from being too formal. My mom (being the know it all calligrapher) actually said that font is pretty formal, but we just liked the way it looked! Here is the formatting and words in Renaissance (sorry it's all blurry, I don't know why it's doing that!):
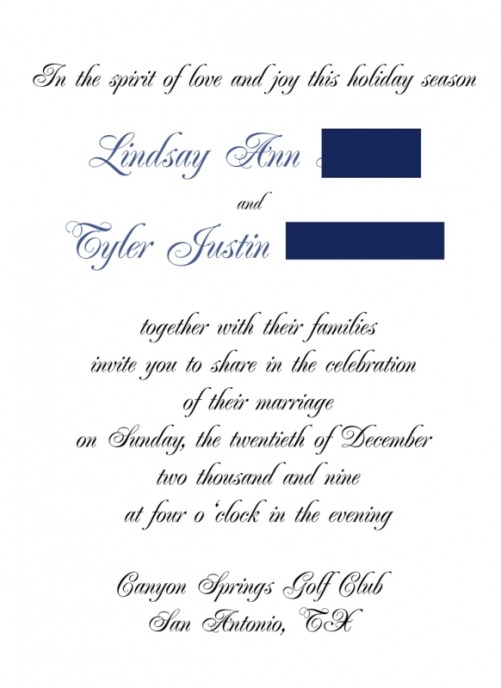


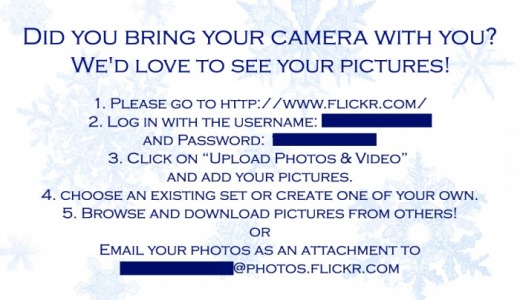
Photo Sharing Cards
I had a hard time deciding which photo sharing site to use, but ended up picking Flickr for a few reasons:
1) If you get their Pro account ($25/year, not too bad), you have unlimited photo upload and storage (I figure I can upload my pro pics to this site to share with family once I get them after the wedding, which will make good use of their unlimited storage capacity)
2) You can email your photos to the account for upload, so people won't even have to log in if they don't want to.
3) They have pretty good organization tools
4) They allow you to download the files at their original resolution (with the pro account) - something that was very important to me
The other site I was looking at was Picasa through google. They also allow you to download your photos at the same resolution as the original (with the free account). Their free version has 1GB of storage, and their next step up for $20/year is 10GB (and it combines this space with your gmail storage, which might mean that you get the space already in your gmail too, not sure). The main reasons I ended up choosing Flickr instead was because I felt like Flickr's organizing tools were a little better, and also because it was actually unlimited storage (even though the 10GB in Picasa probably would have been enough).