Table of Contents - so you know approximately where to look on this page
1. "I Do" Cake Table Letters
2. Photobook Guest Book
3. Shoes - Rhinestones on bottom
4. Shoes - Dyeing
5. Cake Topper
6. Wedding Day Hoodie
7. Flip-Flops (nothing special)
8. Pearl bracelets
9. Hair Pins
10. Cardbox
11. Cake server and toasting flutes
2. Photobook Guest Book
3. Shoes - Rhinestones on bottom
4. Shoes - Dyeing
5. Cake Topper
6. Wedding Day Hoodie
7. Flip-Flops (nothing special)
8. Pearl bracelets
9. Hair Pins
10. Cardbox
11. Cake server and toasting flutes
DIY Checklist
Done
- "I Do" letters for cake table
- Rhinestones on bottom of wedding shoes
- Photobook as guest book (half DIY with Photoshop)
- Photo sharing cards (half DIY with Photoshop)
- "Mrs. W" Hoodie (HUGE thanks to fellow knottie Macdidlyicious for making this!)
- Reception Flip-flops
- Dyed my shoes for my bridals - love them!
- Made my wedding day and RD bracelets
- Hair pins made
- Invites started 9/1, sent out 10/24!
- Silk bouquet used for my bridal portraits and will be re-used as my toss bouquet
- Card box
- Decorated toasting flutes and cake server
- CP are done and waiting to go
- Unity candle ready to go
- Cake topper done and dropped off with cake lady
- Table numbers
- Escort cards
To-Do
- Garlands and wreaths for reception - mostly done
- Programs (printed and about 80% stamped, need to be folded
- Favors - all made, just need to be stuffed in baggies
"I Do" Letters for the Cake Table
I know this is a pretty common thing to do, but I really liked the idea of having the letters "I Do" on the cake table. It took me a while to come up with the design idea, but I finally decided on something that I liked. Tyler was complaining a little because he thought that with the little details it was harder to read. I kind of agree, but I'm not the type of person who can keep things really plain and simple, so I couldn't refrain from adding a few decorations to it. First I added the pearls on a string around the edges. Then I just used little punched-out snowflakes that I then painted with sparkle glaze and I added a few clear and light blue rhinestones. All in all pretty easy. Sorry the lighting in these pics isn't the best, but it gives you an idea of what they look like.
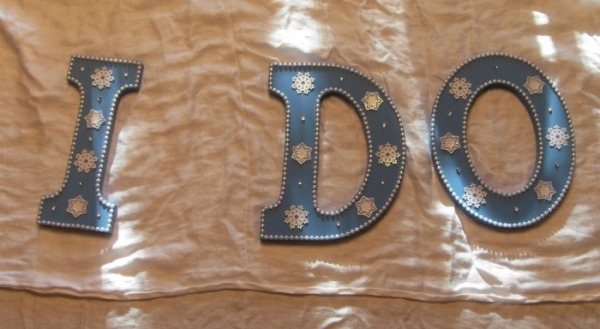
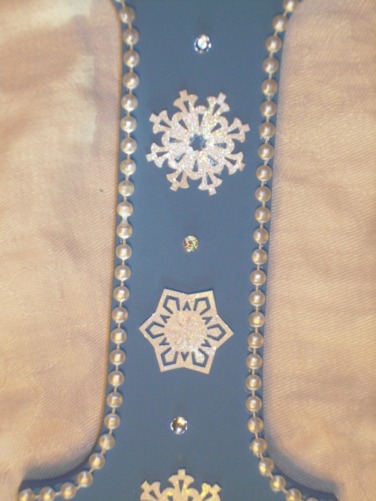
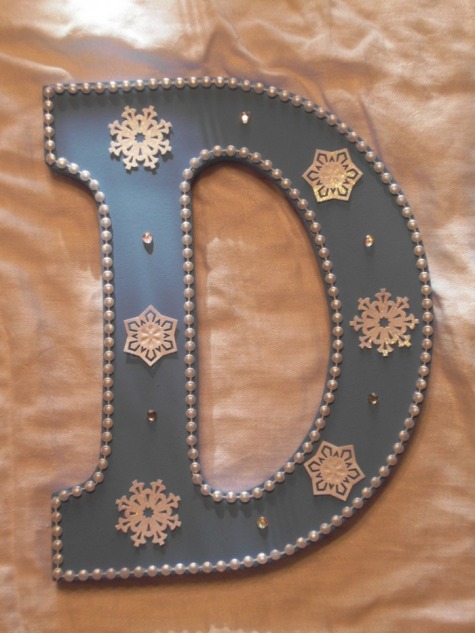
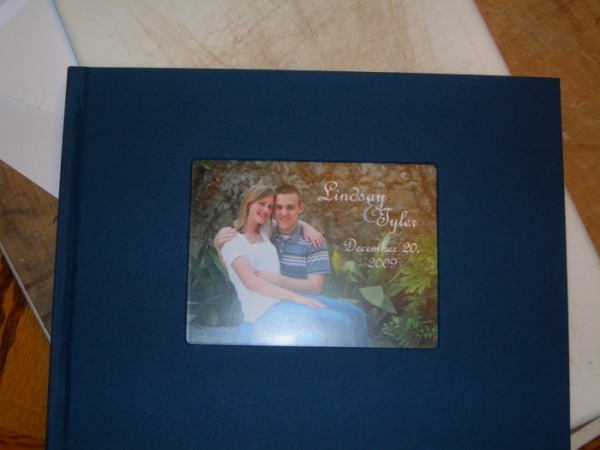
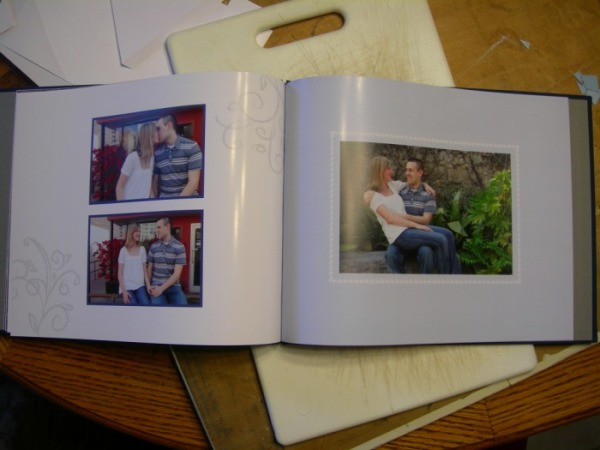
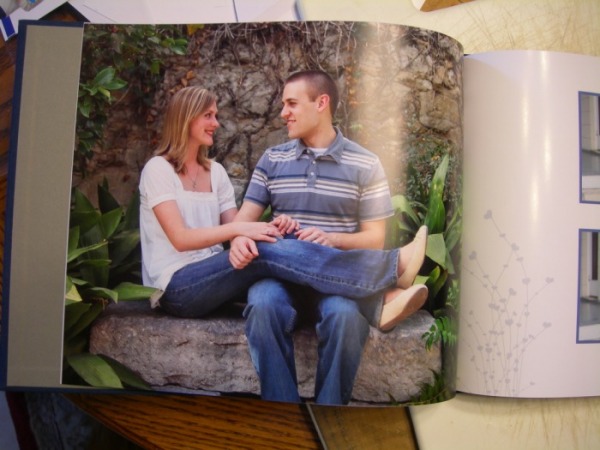
Photo Book as the Guest Book
I know this isn't completely DIY, but oh well.
After doing some research on here and some other wedding boards, I decided to use MyPublisher to make our photo book. I'm sure the other sites would've been great too, but people seemed generally pleased with this site and they also offer a 20% discount for Costco members.
I wasn't that excited about the pre-made templates they offered so I went ahead and designed my own in Photoshop. I'm not a whiz at PS, although I must say that all of the DIY stuff has forced me to learn a lot about the program! What I ended up doing was creating sheets at the recommended size (11.8"x8.58" - not sure now where I got these dimensions) at 300 DPI (recommended is 180, so I'm hoping this increased DPI won't hurt it). Then I just made my design, saved it to the maximum quality JPG, and uploaded them to the MyPublisher software. I made every page the full-page picture.
Here is a link to my current version of the photobook. The cover will be navy. I really hope it prints ok!
http://tinyurl.com/l3la6g
Book ID:S2585892
Password:2694594
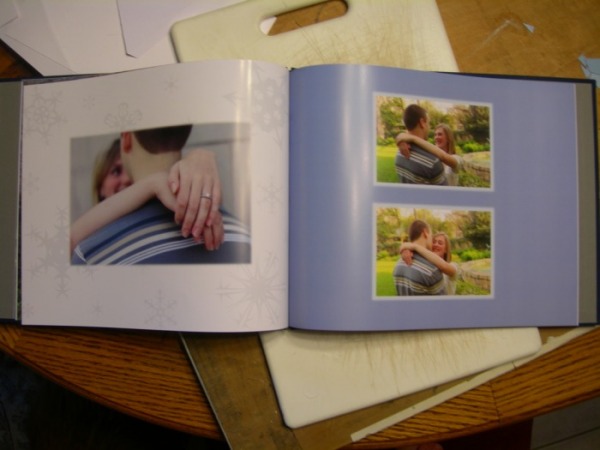
Got it today! (9/4) I'm very happy with how it turned out. I think if I end up using them to make any wedding albums I'll definitely upgrade to the leather binding though. The linen is fine for this purpose, but I think the leather would make it seem a lot more high quality.
Here are some pics of the finished product. I apologize for the not so good quality of my pics. I couldn't use the flash without getting that glare, and when I turned it off it caused most of the pictures to blur. Oh well.
After doing some research on here and some other wedding boards, I decided to use MyPublisher to make our photo book. I'm sure the other sites would've been great too, but people seemed generally pleased with this site and they also offer a 20% discount for Costco members.
I wasn't that excited about the pre-made templates they offered so I went ahead and designed my own in Photoshop. I'm not a whiz at PS, although I must say that all of the DIY stuff has forced me to learn a lot about the program! What I ended up doing was creating sheets at the recommended size (11.8"x8.58" - not sure now where I got these dimensions) at 300 DPI (recommended is 180, so I'm hoping this increased DPI won't hurt it). Then I just made my design, saved it to the maximum quality JPG, and uploaded them to the MyPublisher software. I made every page the full-page picture.
Here is a link to my current version of the photobook. The cover will be navy. I really hope it prints ok!
http://tinyurl.com/l3la6g
Book ID:S2585892
Password:2694594
Got it today! (9/4) I'm very happy with how it turned out. I think if I end up using them to make any wedding albums I'll definitely upgrade to the leather binding though. The linen is fine for this purpose, but I think the leather would make it seem a lot more high quality.
Here are some pics of the finished product. I apologize for the not so good quality of my pics. I couldn't use the flash without getting that glare, and when I turned it off it caused most of the pictures to blur. Oh well.
Shoes - Rhinestones
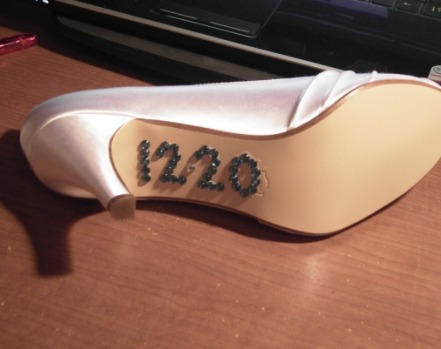
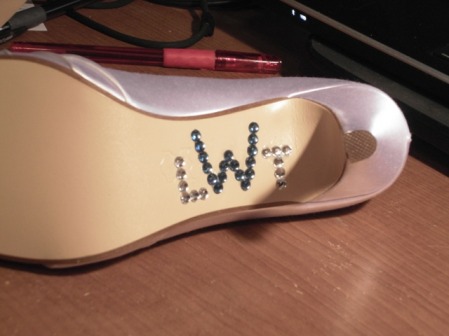
I saw a picture of a girl who had added little rhinestones to the bottom of her shoes and thought it was really cute. I couldn't find super small rhinestones so I couldn't fit everything I wanted, but I think it still came out pretty well. I just did our monogram on one shoe and the date on the other.
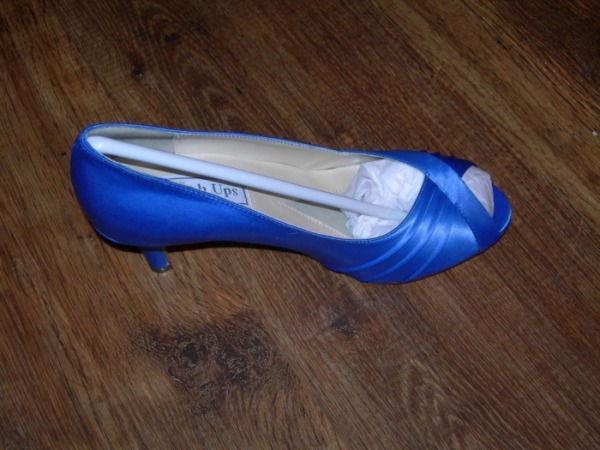
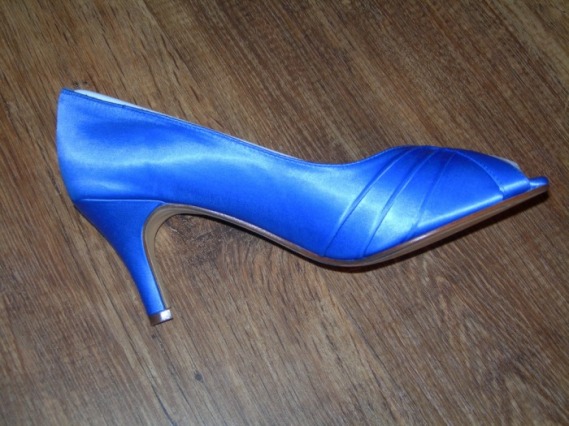
Shoes - Dyeing
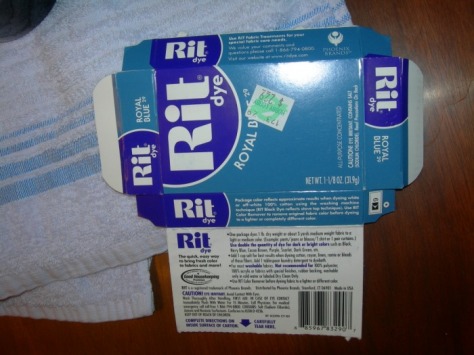
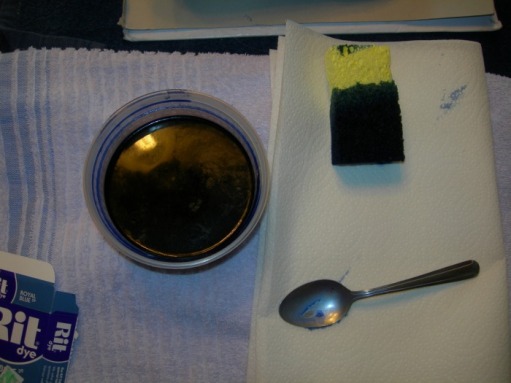
As you can read in my attire section, I bought two sizes with the intention of returning the one that didn't fit, but somehow got them dirty while trying them on. Well, after my cleaning efforts just ruined the shoes even more, I decided to keep them and dye them for my bridals. It's nearly impossible to find anything about DIY dyeing. I was going to use TheSaltyPeanut's instructions, but I was worried about submerging my shoes in water since they're satin. Then I found one site that gives some instructions on dyeing satin pointe shoes and thought that might be better. I bought some RIT dye in Royal Blue and just dyed them over Labor Day weekend. I had only looked at the color of the RIT box and not actually read what color I was using, so when I started dabbing on the blue and realized it was royal, I was a little panicked (I wanted a grayer blue that goes with the rest of my stuff). Now that it's dried lighter and a little less royal, I really really love the color. I think it will be just the right "pop" in the pictures. Yay!
Materials:
RIT dye in color of your choice
1 tbs of laundry detergent
some salt (I added like 1 tbs)
Water, of course
Your shoes
A kitchen sponge or foam brush
Gloves
Lots of paper towels or newspapers to protect your work space
FOR AFTER: Sealant spray - I tried out Tree House Studio Gloss Acrylic Sealant Spray
Here's what I did:
1. I brought 1.5 cups of water to a boil. I know it says 2 cups for 1 packet, but I was trying to concentrate the color and make it darker.
2. I added the water to a little container that already had the RIT dye, 1 tbs laundry detergent, and about 1 tbs salt, and stirred well.
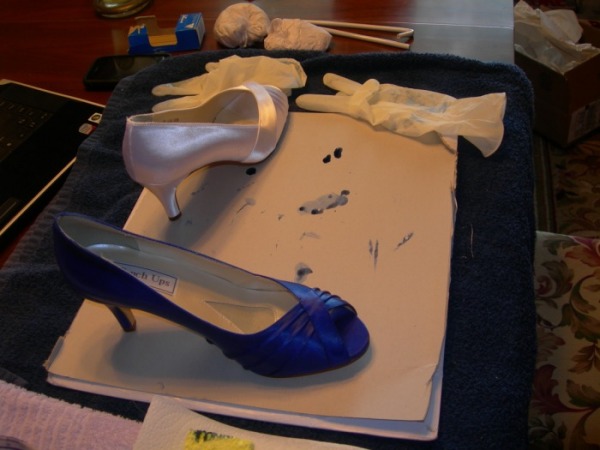
3. Put the gloves on! I dipped the edge of the sponge in the dye and tried to squeeze out extra liquid on the side of the container.
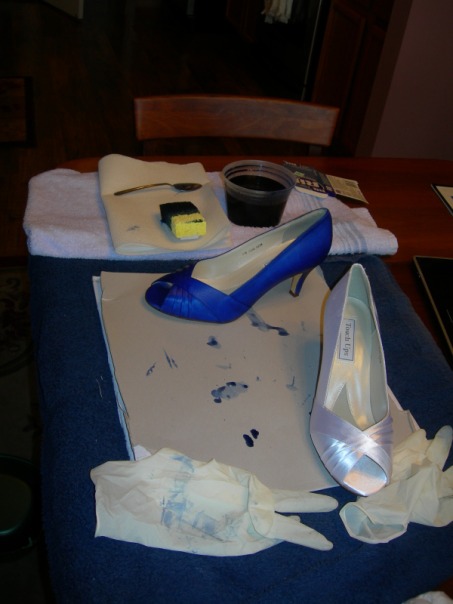
4. Gently stroked/dabbed the dye on. The satin in the shoes picked up the liquid very quickly and easily. It soaked into the fabric and spread out quickly, so it would be pretty difficult to spot dye anything with this material (like if you wanted polka dots or anything).
5. I put 1 coat of dye on one shoe and then set it aside to dye a little while I did the other one. Then I went back and put 1 more coat on each.
6. Set them in the windowsill where it's sunny and warm to dry for a few days.
7. I saved the dye in the tupperware (don't know if it'll still be useable but I thought it was worth trying) in case I needed to touch up any spots once they finished drying. I ended up putting another coat on like 6 weeks later, and re-used the dye. I just heated it back up in the microwave for like 3-4 min and tried it out on a paper towel first. Seemed ok so I went ahead and used it. Make sure to test it on something else if you do this, because I doubt you're supposed to re-use the dye.
8. SEALING: I sprayed them with Tree House Studio Gloss Acrylic Sealant spray from Hobby Lobby. Make sure you have another sponge for this step. I noticed that the dye ran a little when I sprayed it, and any stray fabric threads (like fly away hair strands on humid days) will get stiff and reflect the light. I just used the sponge to smooth out the dye and pat down those loose threads. I did the double coat as instructed on the spray bottle. UPDATE: What I discovered is that the sealant does a great job at keeping the dye on the shoe (as in it didn't rub off on my feet or dress at all), but not a good job at keeping the water out (as in any water the touched the shoe left spots where the dye ran). So if you only care about not getting dye on your dress, and don't care about having the shoes stay evenly colored, then this should work. If you want better preserved shoes then you might want to look for other sealant.
Materials:
RIT dye in color of your choice
1 tbs of laundry detergent
some salt (I added like 1 tbs)
Water, of course
Your shoes
A kitchen sponge or foam brush
Gloves
Lots of paper towels or newspapers to protect your work space
FOR AFTER: Sealant spray - I tried out Tree House Studio Gloss Acrylic Sealant Spray
Here's what I did:
1. I brought 1.5 cups of water to a boil. I know it says 2 cups for 1 packet, but I was trying to concentrate the color and make it darker.
2. I added the water to a little container that already had the RIT dye, 1 tbs laundry detergent, and about 1 tbs salt, and stirred well.
3. Put the gloves on! I dipped the edge of the sponge in the dye and tried to squeeze out extra liquid on the side of the container.
4. Gently stroked/dabbed the dye on. The satin in the shoes picked up the liquid very quickly and easily. It soaked into the fabric and spread out quickly, so it would be pretty difficult to spot dye anything with this material (like if you wanted polka dots or anything).
5. I put 1 coat of dye on one shoe and then set it aside to dye a little while I did the other one. Then I went back and put 1 more coat on each.
6. Set them in the windowsill where it's sunny and warm to dry for a few days.
7. I saved the dye in the tupperware (don't know if it'll still be useable but I thought it was worth trying) in case I needed to touch up any spots once they finished drying. I ended up putting another coat on like 6 weeks later, and re-used the dye. I just heated it back up in the microwave for like 3-4 min and tried it out on a paper towel first. Seemed ok so I went ahead and used it. Make sure to test it on something else if you do this, because I doubt you're supposed to re-use the dye.
8. SEALING: I sprayed them with Tree House Studio Gloss Acrylic Sealant spray from Hobby Lobby. Make sure you have another sponge for this step. I noticed that the dye ran a little when I sprayed it, and any stray fabric threads (like fly away hair strands on humid days) will get stiff and reflect the light. I just used the sponge to smooth out the dye and pat down those loose threads. I did the double coat as instructed on the spray bottle. UPDATE: What I discovered is that the sealant does a great job at keeping the dye on the shoe (as in it didn't rub off on my feet or dress at all), but not a good job at keeping the water out (as in any water the touched the shoe left spots where the dye ran). So if you only care about not getting dye on your dress, and don't care about having the shoes stay evenly colored, then this should work. If you want better preserved shoes then you might want to look for other sealant.
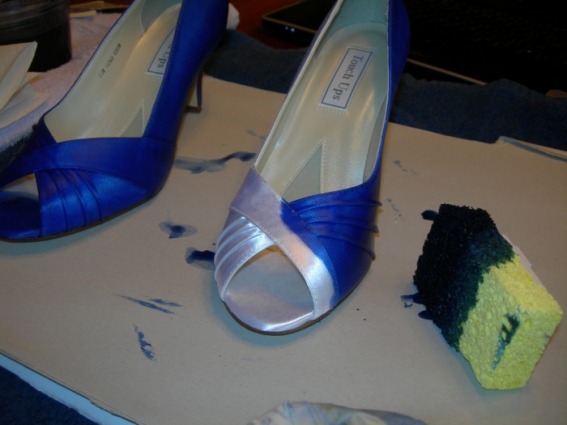
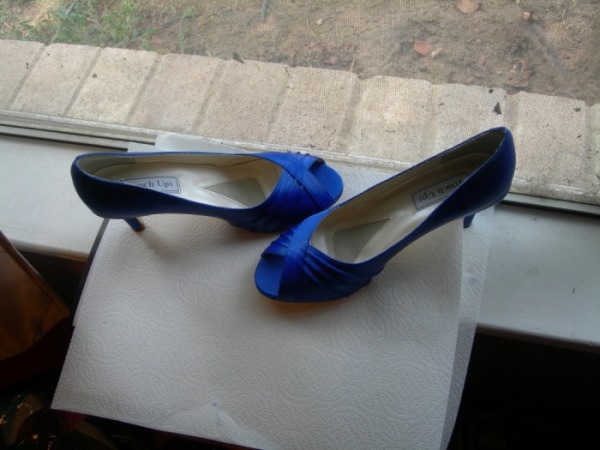
Here they are after they've dried for two days. The dye turned out even enough that I'm not gonna deal with another coat. Now I just need to find some sort of sealing spray so they don't rub off on my dress. I love them! I think this is one of my favorite DIY projects actually. And the blue is really really pretty! Yay!
Cake Topper
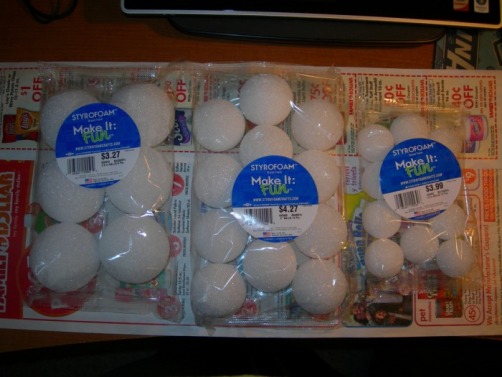
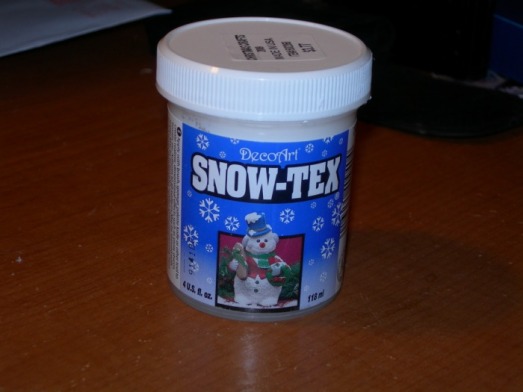
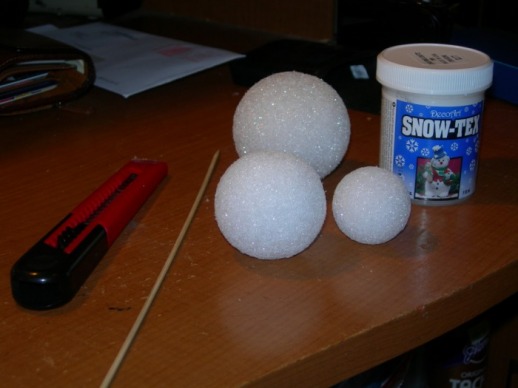
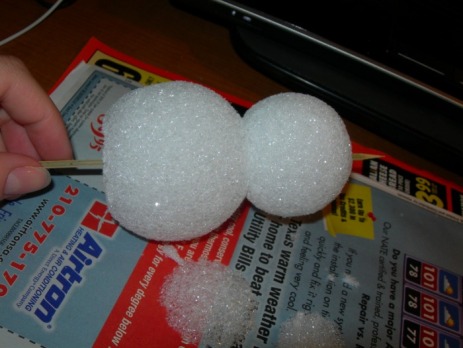
So I saw these bird cake toppers made by Ann Wood and thought they were so adorable. They don't really fit in with our theme (probably would be better for an old Hollywood theme or something) and Tyler didn't like the idea of us being birds. He suggested I make little snow people bride and groom. I originally had figured I would make it similar to the birds, just as snowmen instead, but then I had this idea of using styrofoam balls instead. I went to Hobby Lobby and found three different size balls. Then I went in their Christmas section and found "Snow-Tex." It's like stucco that makes it look like snow. I started my first one tonight (9/4).
Materials:
Snow Tex fake snow stuff
Three different size styrofoam balls
Exacto knife
Some type of skewer - I used bamboo grill skewers because that's what I had in my house already
Some type of brush - I used foam
Newspaper to cover your work area
What I did:
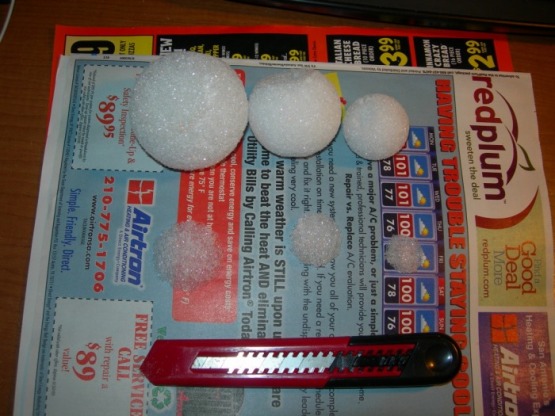
I shaved off the bottoms of each styrofoam ball to help them sit on each other. I made the bottom one the flattest so it will sit upright.
Snow Tex fake snow stuff
Three different size styrofoam balls
Exacto knife
Some type of skewer - I used bamboo grill skewers because that's what I had in my house already
Some type of brush - I used foam
Newspaper to cover your work area
What I did:
I shaved off the bottoms of each styrofoam ball to help them sit on each other. I made the bottom one the flattest so it will sit upright.
I then poked the skewer through each styrofoam ball trying to keep it centered. Be careful on the last one so you don't poke the whole way through. Once I had it situated I cut off the end of the skewer.
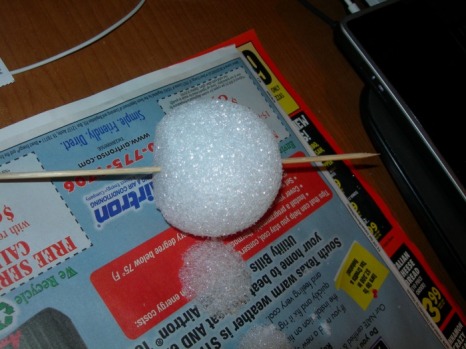
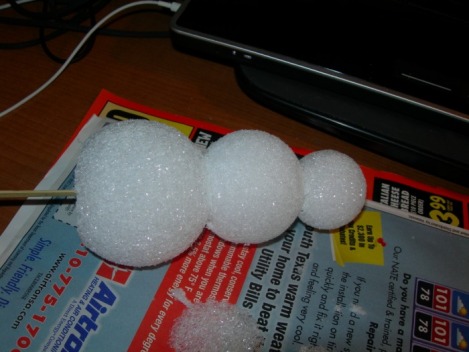
Then I just pulled out the Snow-Tex and started dabbing it on. I ended up pulling each ball apart and sticking each on a skewer to make it easier to cover them. As it was drying I just stacked them back up on top of each other and set it aside to let it dry.
Here is the result so far:
Here is the result so far:
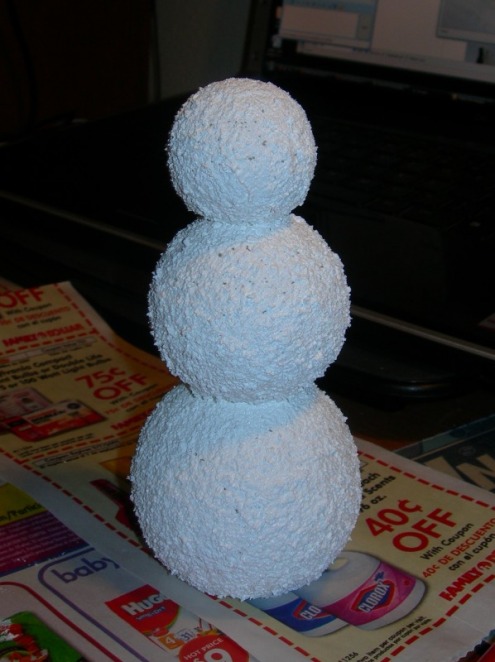
Looks like I will need to add another coat to some areas, so once it's dry I'll do that.
.
.
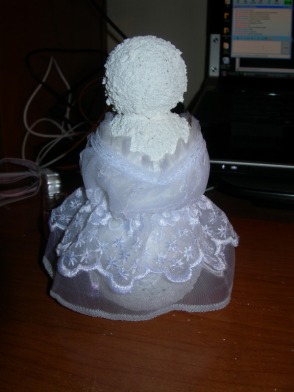
LOL. I tried making a wedding dress for my snow bride and this is the result. Seeing how all I've ever sown before is some buttons back onto Tyler's shorts and a a pillow case, I was actually somewhat pleased with this dress. This is definitely not what I'm going to use, but I thought I'd post pictures for your enjoyment.
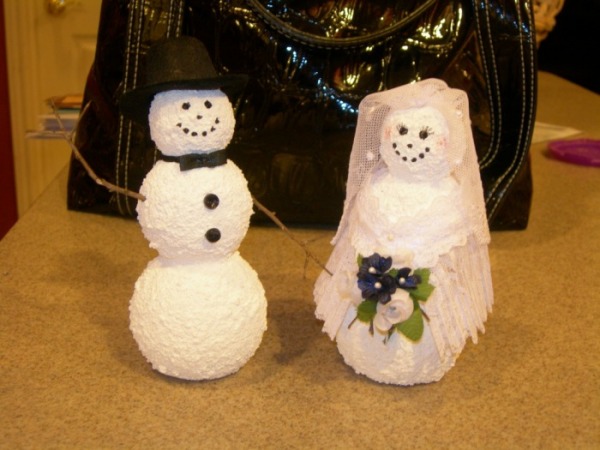
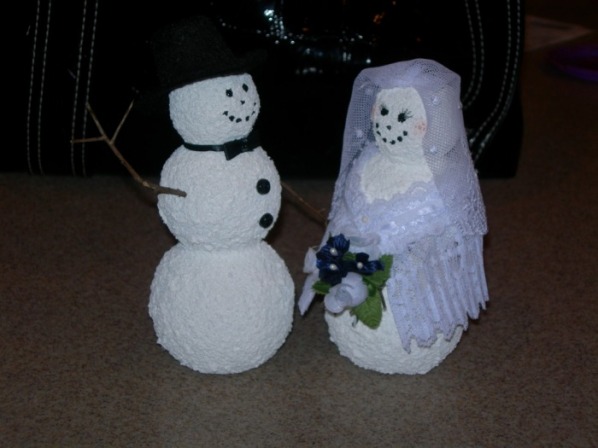
Here are some pictures of the final Mr. and Mrs. Snowmen.
I ended up using black squeeze paint for the eyes, some of my mom's rouge for the blush, and a thin sharpie for the eyelashes. I went with the simpler designs for the outfits since the dress and vampire tux weren't working, haha. I found branches from one of my bushes and sprayed the same sealant spray from my dyed shoes to make sure they don't rot on me.
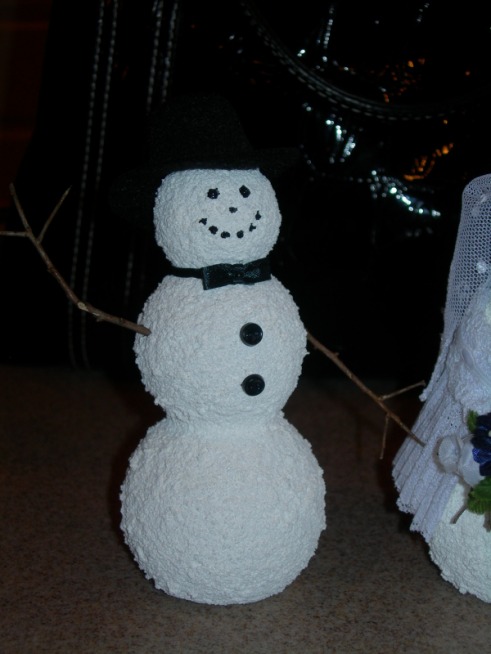
The groom just has black buttons tacky glued on, and a black ribbon bow tie. I used a black ball head sewing pin (don't know what they're actually called) to hold it in place. I found his top hat in the doll aisle at Hobby Lobby.
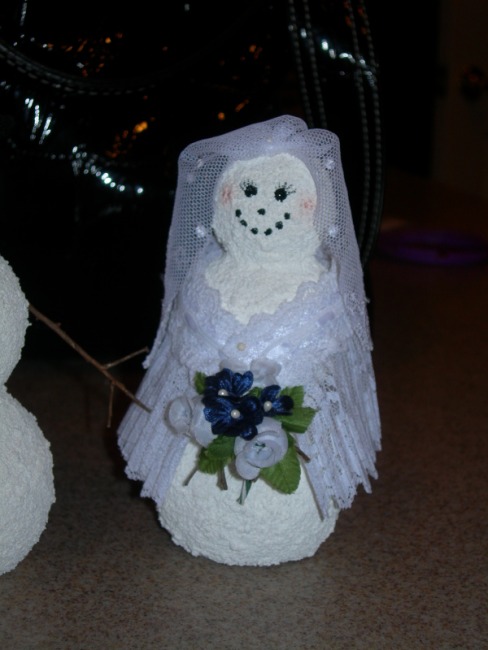
The bride has some lace trim from Hobby Lobby as her shall (I just shortened it some) and other lace trim that I gathered into a point for her veil. I also used white ball head pins to hold those in place. Her flowers are just those small ones you find in the craft stores.
I ended up using black squeeze paint for the eyes, some of my mom's rouge for the blush, and a thin sharpie for the eyelashes. I went with the simpler designs for the outfits since the dress and vampire tux weren't working, haha. I found branches from one of my bushes and sprayed the same sealant spray from my dyed shoes to make sure they don't rot on me.
The groom just has black buttons tacky glued on, and a black ribbon bow tie. I used a black ball head sewing pin (don't know what they're actually called) to hold it in place. I found his top hat in the doll aisle at Hobby Lobby.
The bride has some lace trim from Hobby Lobby as her shall (I just shortened it some) and other lace trim that I gathered into a point for her veil. I also used white ball head pins to hold those in place. Her flowers are just those small ones you find in the craft stores.
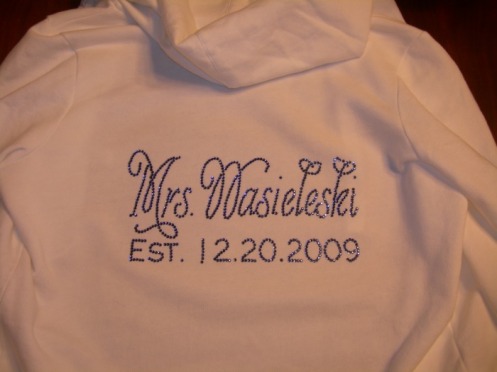
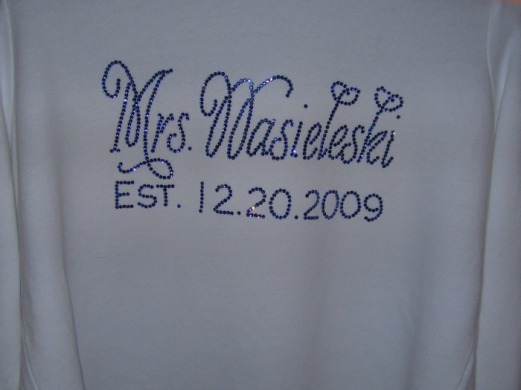
"Mrs. W" Hoodie
So this was probably the least DIY project on here. I had fellow knottie Macdidlyicious (thanks again!) design the rhinestone layout for me, and then all I had to do was iron it on! I just bought the white hoddie from Old Navy and gave it a go.
NOTE: For anyone working with hotfix rhinestones, DO NOT iron directly onto the mylar paper (the clear sticky paper holding the rhinestones). My iron turned off and wasn't getting hot enough to melt the hotfix so I started ironing directly on the mylar paper. It didn't do anything then since the heat was still off. However, once I realized it was off and I turned it back on, I didn't think to put the pillow case back over the mylar and just went at it. Bad idea! It melted the mylar paper! Fortunately it only moved a couple rhinestones so you can't tell, but this could have been bad.
And here's the completed work! I love it! (Although I must admit I'm not a fan of my new name, haha)
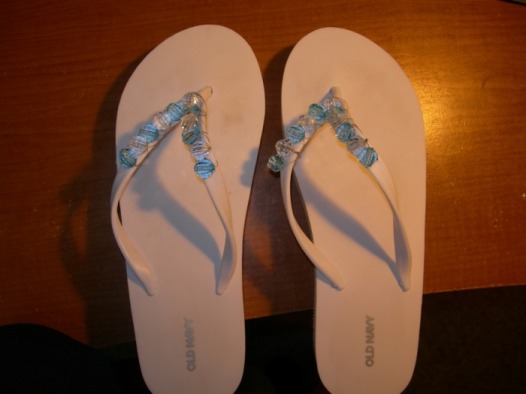
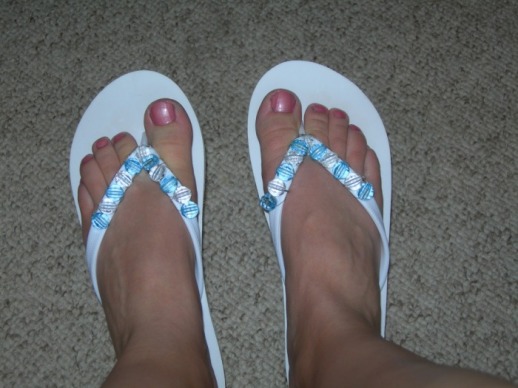
Reception Flip-Flops
I just bought some white platform flip-flops from Old Navy and decided to spruce them up a little. I used some clear and blue colored glass beads from Hobby Lobby and some jewelry wire I already had and wound on the beads while watching a movie. Not exactly the prettiest thing I've ever seen, but a little more fun than just the plain flip-flops. I'll probably wear these while getting ready that morning and then bring them along for the reception in case I hate my heels by then.
I apologize for my ugly feet.
I apologize for my ugly feet.
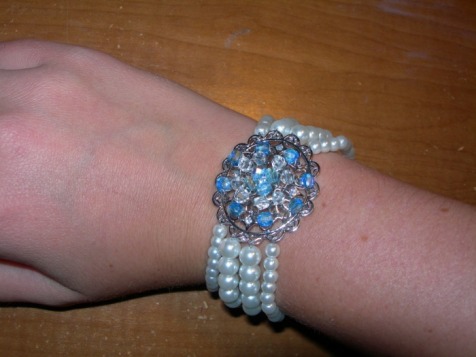
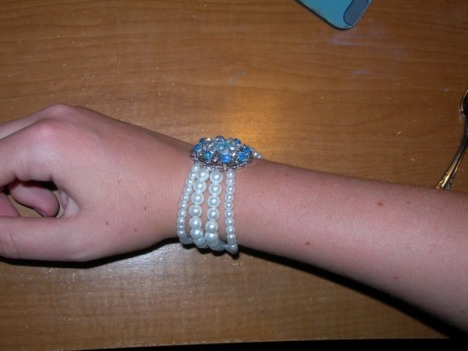
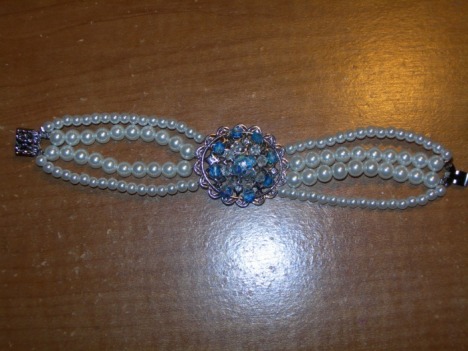
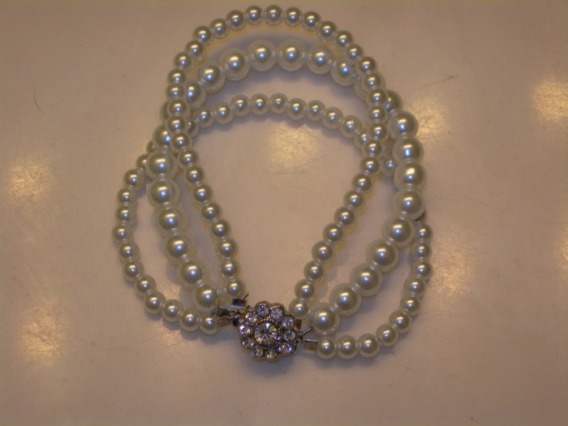
Pearl Bracelet
With the whole Haute bride bracelet fad, I wanted something kind of similar, but I wanted to try making it on my own. I found a metal pendant, beads, wire, and pearls at Walmart and thought I'd give it a shot. I like the way it turned out, but I don't think it's really "me." My other jewelry is on the simpler side, so I think I might wear this one for the RD (or even change the lengths of the pearl strands and put it around my bouquet), and wear the simpler one I made for the wedding.
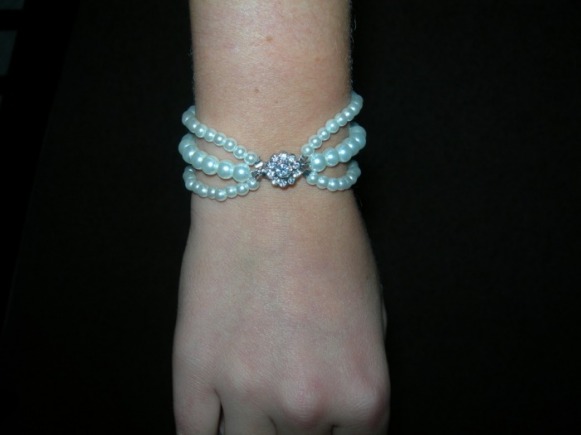
Here is the second bracelet I made because the first one was just a little too much for me. I really like the simplicity of this one (I wasn't even planning on wearing a bracelet) and it has a nice sparkle with that rhinestone flower in the middle. Much better.
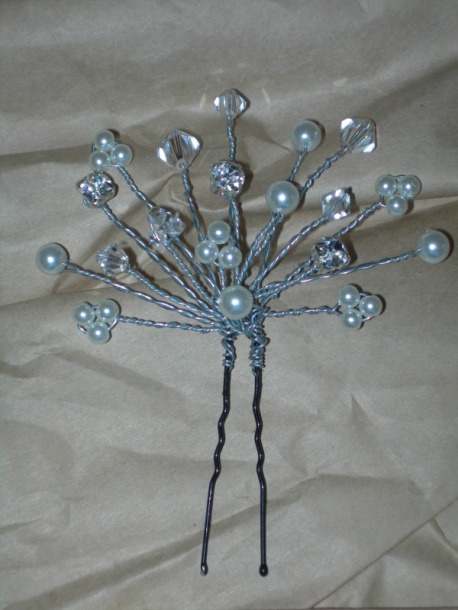
Hair Pins
You can see some of my hair pin inspirations under my Bride's Look page. I'm planning on making 3 large ones to go on top of the bun part of my updo. I might make a few single pearl and crystal ones to randomly stick in the bun too. I'm also considering using my left over beads to make a few for the BMs to wear if they want.
Here are my second versions of the hair pins. I like these ones a lot better. Not quite as overwhelming. I apologize for the dog hair on the blanket, didn't realize it until I looked at these pics on my computer.
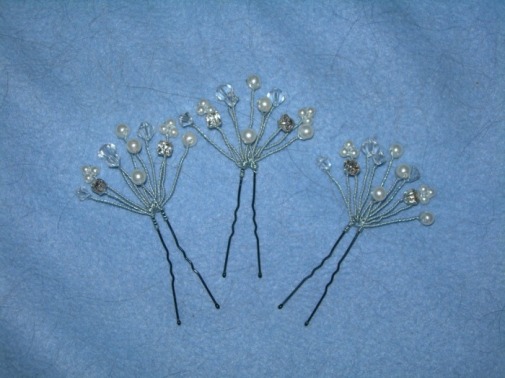

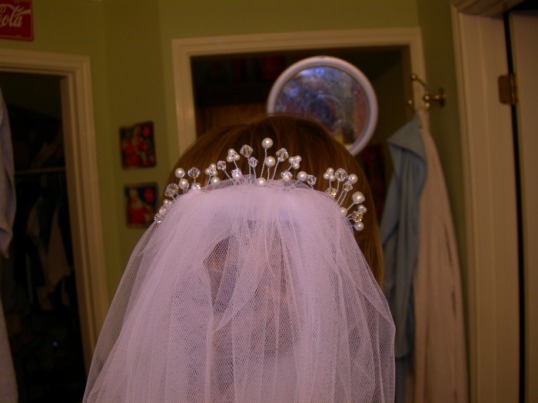
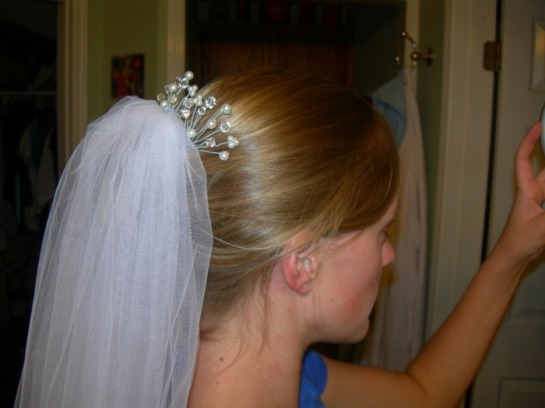
Here is the first one I made. I love the way it looks just sitting there. I thought I liked the way it looked when I only had one in my hair too. Then I made two more and tried it out with all three. Way too much. It looked like I just had a big hunk of sparkly metal on the back of my head. I am now in the process of toning them down to about half that size and business. That should be much better.
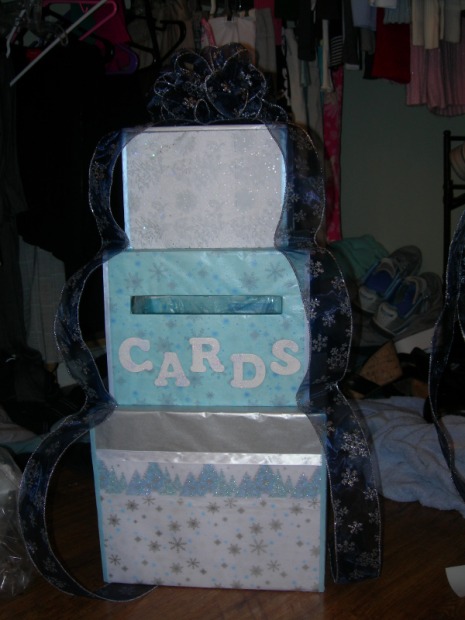
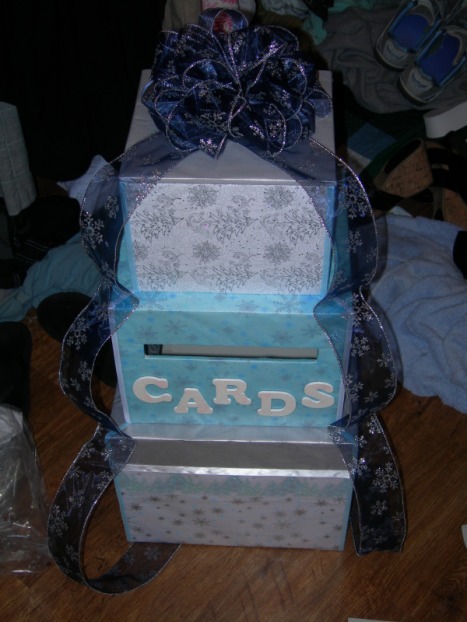
Cardbox
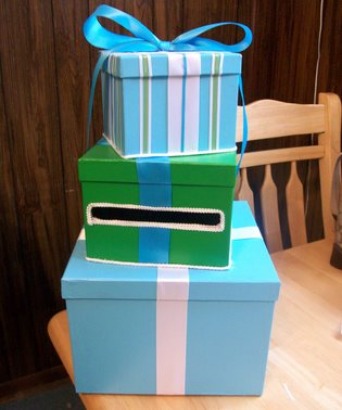
The cardbox is almost finished. I pulled out my mom's foam board scraps and started designing boxes. I made the bottom one 12x12x10, the middle one 10x10x8, and the top one 8x8x6. It ended up being pretty tall, and my mom was thinking maybe too big, but I like it that way. Seems more like real presents that way. I made a slit about 2/3 the way up on the middle box that is 8" long and 1" tall. I forgot to take pics of each step, but essentially all I did was use packing tape to make each box. I wrapped each box individually with the tissue paper. The bottom two have tops that both have holes in them for easier assembly (so I could tape from inside), and the tops got wrapped with the bottom. The top one had a separate top that got wrapped individually and then tacky glued down.
I found some really cute tissue paper at Costco that I used to wrap the boxes. I hot glued ribbon along all the edges because I couldn't get the tissue paper to all line up, so this way the ribbons cover that. I made a bow using these instructions but you can also try this site. I'm going to glue on ribbon along the edges, like you see in the pictures below.
I'm sorry these pics aren't the best. It's in my dark closet, so once I move it to a better spot I'll take more pictures. Also, it doesn't look as wrinkly in person. Oh well.
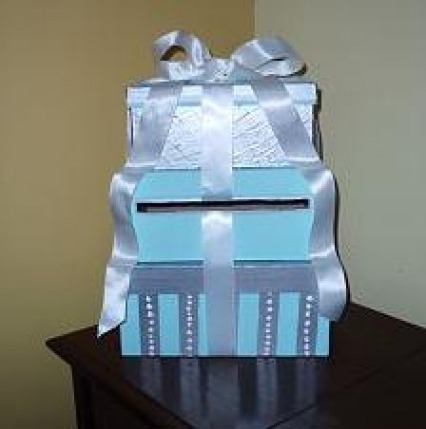
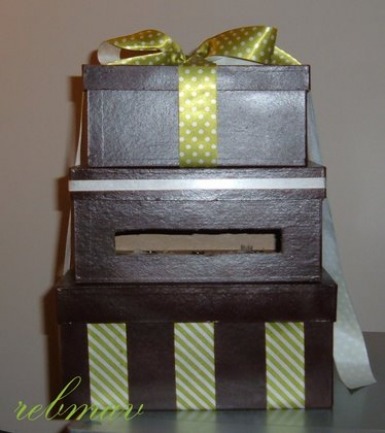
Here are some of my cardbox inspirations:
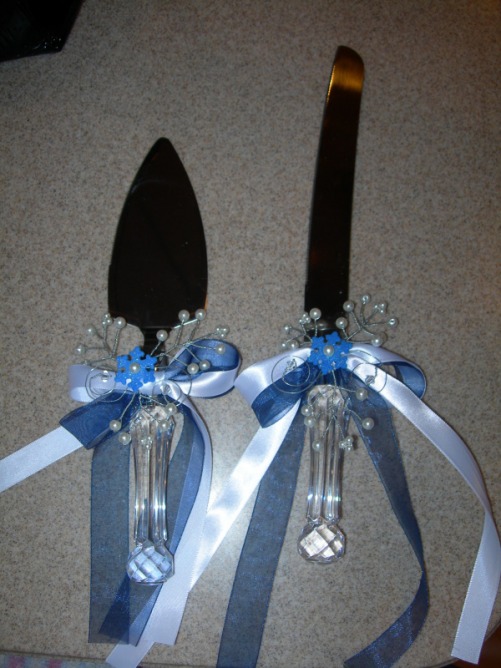
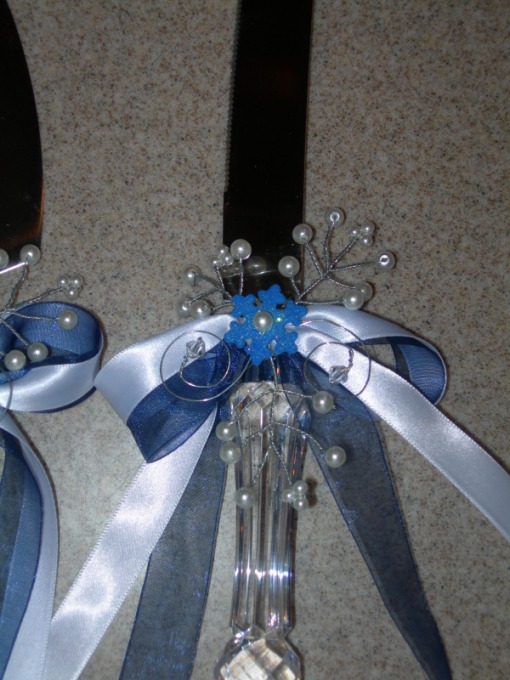
Cake Server and Toasting Flutes
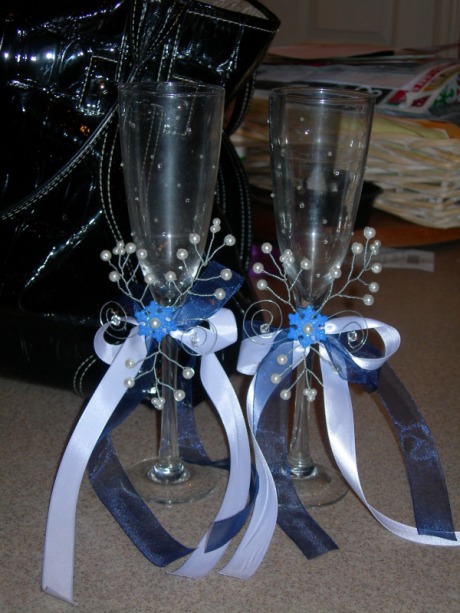
I found some examples on ones online that I thought were really cute, but I didn't want to pay $30-40 for each item so I decided to make them myself. The pearl and wire parts really weren't that hard to make, although if I were to do them again I would make them a little smaller. I still need to trim the ribbon but they're mostly done.
The toasting flutes I bought from Walmart for like $15. They came with the mini rhinestones on them.
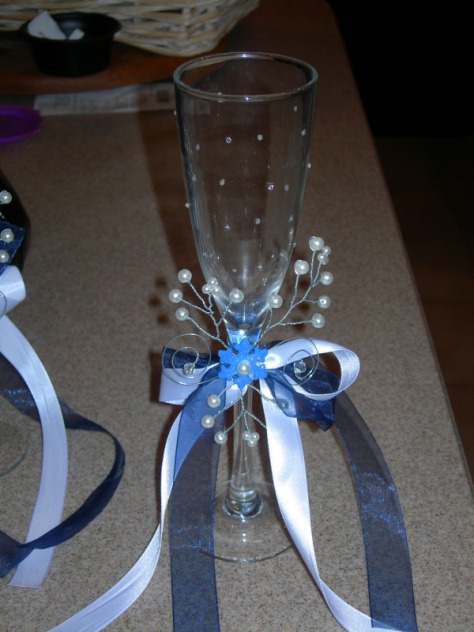
The cake knife and server I also bought from Walmart for $10.